Friday, November 12, 2010

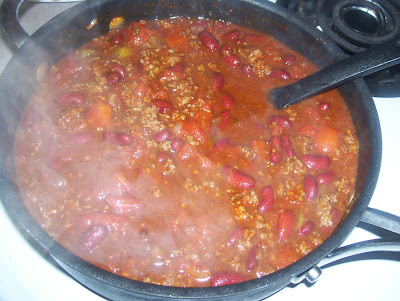
Delicious Chili!!!

Yummy yummy yummy delicious delicious delicious!!!

I just kind of based it on what I roughly remembered my parents adding in when they made it.

Ingredients
- 1 lb ground meat
- 2 packs Chili seasoning packs
- 1 (15.5 oz) can of Dark Red Kidney beans
- 1 can stewed tomatoes
- 1 can diced tomatoes (salt free)
- 1 cup seasoning mix (the onion chopped mix)
- Rice

Direction
1. Brown the ground meat.
2. Add the seasoning mix to the meat. Cook until the seasoning is soft. Add a few dashes of hot sauce.
3. Add the tomatoes. Cook until boiling.
4. Add beans. Let reach boiling. Add a bit of Tony's.
5. Add the chili seasoning, cook to boiling.
6. Cook rice.
7.The chili should be done, so definitely cover your rice with it and EAT EAT EAT IT'S DELICIOUS EAT!!!

Sunday, October 31, 2010

Crawfish Fettuccine & Banana Pudding Pie

Andrew and I babysat at his sister's house with his other sister, Katie. We were left with the task of feeding four children (including Andrew) and ourselves. Amanda left us with a recipe from a cook book she received in medical school for crawfish Fettuccine and a recipe for a homemade banana pudding pie! Lauren, one of Andrew's nieces "helped" us as well...


Crawfish Fettuccine
Ingredients:
- 1 1/2 sticks butter
- 3 stalks celery, 2 large onions (chopped), 1 large bell pepper (chopped) == You can buy the seasoning bags of chopped things, which is what we did
- 3 cloves garlic (we used minced garlic)
- 1 lb Velveeta cheese
- 2 lbs crawfish (or shrimp)
- 2 tbsp jalapeno relish
- 1/4 cup of flour
-1/2 pint of whipping cream
- 1 lb Fettuccine noodles
- Sprinkling of Parmesan Cheese

Steps:
1. Sautè the onions, bell pepper, and celery in butter.


2. Add flour, stir and cover. Cook for 15 minutes on low.


3. Add cream, cheese, garlic and jalapeno relish. Stir until cheese melts.
5. Add crawfish. Cook 30 minutes.
6. In a separate pot, boil noodles. Do not add salt. Combine everything into a casserole dish. Sprinkle with Parmesan cheese.
7. Bake at 350 degrees for 15 minutes
Serves approx. 8 people and freezes well.

It was delicious. It was also sort of sweet. Surprisingly so. So you may want to add more seasoning.

Banana Pudding Pie
Ingredients
Pie:
- 1 (12 oz.) box Vanilla Wafers (set aside 30)
- 1/2 cup melted butter
- 2 large bananas
- 4 egg whites (save egg yolks)
- 1/2 cup sugar
Filling:
- 2 cups milk
- 3/4 cup sugar
- 1/3 cup flour
- 2 large eggs
- 4 egg yolks

Directions:
1. Preheat oven to 350. Reserve 30 vanilla wafers; pulse remaining in a food processor 8-10x until coarsely crushed (yield ~2.5 c). Stir with butter until blended. Firmly press on bottom, sides, and lip of a 9 inch pie plate.
2. Bake at 350 for 10-12 minutes or until lightly browned. Remove and cool ~30 minutes or until completely cool.
3. Arrange 1/2 banana slices over bottom of crust. Prepare the FILLING** and stir 3/4 c. hot filling over bananas, top with 20 of reserved wafers. Spread 3/4 c. hot filling over wafers and cover with remaining bananas. Spread rest of filling (~1c) over. Filling will be ~1/4'' higher than top of crust.
4. Beat egg whites at high speed until foamy. Add sugar 1 tbsp at a time, beating until stiff peaks form and sugar is dissolved. Spread meringue over hot filling sealing edges.
5. Bake 350 for 10-12 minutes or until golden brown. Remove and let cool ~1 hour. Coarsely crush remaining wafers on top, cover, and chill for ~4 hours.

FILLING**
Directions
1. Whisk together all but Vanilla extract in heavy saucepan. Cook over medium-low heat, whisk constantly, 8-10 minutes or until reaches chilled pudding thickness (just bubbling, holds soft peaks). Remove from heat and stir in vanilla. Use immediately.


This is delicious!!! Very rich. Something cool I learned from this recipe was that the flour you add to the filling prevents the egg from curdling...

Friday, October 29, 2010

New Posts Coming Soon

We have a lot more posts coming up (at least three), I've just been too lazy to work on them. That, and I've been working on a book review for another blog of mine, Lead me Onward (www.leadmeonward.blogspot.com), not to mention schoolwork. Also, TODAY'S MY 22nd Birthday WOOHOO! I'll give y'all a picture of my birthday cake so be jealous! I'll get the recipe from Andrew (I promise).

New posts coming soon!!!

Tuesday, August 10, 2010

Busy Day Chicken

We've been pretty poor, but this one isn't too expensive. I downloaded an ap. for my iTouch, "allrecipes.com." I found a recipe for "Busy Day Chicken." This one doesn't even require a real "recipe," but here it is:

Take chicken and put it in a slow cooker. Cover in barbecue sauce and season to taste. Cook for 6-9 hours, depending on the amount of chicken. It will fall off the bone :D!


Saturday, July 31, 2010

New Definitions!

I've been searching through the "Poultry and Wildfowl" section of the Joy of Cooking for a recipe for tomorrow, and I found a recipe that called for "1 jigger brandy."
A jigger is an instrument used to measure liquids that looks like this:
.

Apparently, one side is 1oz. and the other is 1.5oz...and jigger as a measurement (not the actual measuring instrument) means 1.5 oz. of something (generally alcohol). You can sub with a "shot" depending on what kind of shot-glass you are using (short, tall, etc). Just make sure it's 1.5 oz. and you're good to go...cook that is!

Also, a cute start to their section on leftovers:
"The minister's bride set her luncheon casserole down with a flourish and waited for grace. 'It seems to me,' murmured her husband, 'that I have blessed good deal of this material before.'" Bahaha!

Sunday, July 25, 2010

Chicken Casserole (Potatoes, Carrots, & Onions)

So, if you put me on the spot by asking me outright and randomly what my favorite food is, I'll probably falter and make something up. Andrew, on the other hand, will immediately say something very vague, like "chicken." Eventually, you will squeeze "chicken Fettuccine" out, but it's an ordeal. Just FYI, in case you ever wonder, this and crawfish etouffee are my absolute favorite foods.

So...have I convinced you? Do you want to try this amazing "chicken casserole" that is made by mom? Well, because my casserole dishes were not clean (I'm not too lazy to wash; they're storing things right now), we had to cook it stove-top. Luckily, Andrew has this really nice skillet-esque thing. It's about 4'' deep and has a diameter of about 13''. It also has this awesome handle thing going on opposite of the regular handle so you can carry it easily! Well, here is our bastardization of the deliciousness:

Ingredients:
- Chicken MAKE SURE YOU DEFROST BEFOREHAND!! (honestly, it doesn't matter what kind. I don't suggest boneless because it cooks too quickly in my opinion, but do what you want. We used chicken thighs)
- 1 box of chicken broth (go with the larger box)
- water
- 1 1/2-2 cups of baby carrots (washed)
- 4 small potatoes at least.(try to use the ones that won't really work for baked potatoes)
- 3 tbs butter
- Tony's or a similar seasoning
- Rice
- Foil (not really an ingredient, but it's good to know you need it ahead of time)
- 1 1/2-2 yellow onions
*note: You can add more potatoes/carrots/onions at will. It doesn't really matter. It won't destroy the dish because they pretty much remain independent ingredients (aka there isn't any chemical reactions going on there :) )

Directions:
*During this process, add Tony's liberally right before you cook it for a long period of time :)
1. MAKE SURE YOUR CHICKEN IS DEFROSTED
2. Take a nice, large knife that is sharp enough to slice well. Chop the potatoes into large chunks (about 2'' by 1'' [at least]). You'll see how big ours were from the pictures. Add chopped potatoes and carrots to skillet.
3. Slice the onions. DO NOT DICE!!! Add to skillet.
4. Cover with about half the box of chicken broth. Add two tbs of butter.
5. Add water until all vegetables etc are just covered.

6. Cover in foil and simmer on low heat for about 25 minutes. Then check and see if the carrots are cooked all of the way through.

7. Remove from heat and drain out juice. Place veggies somewhere else and add broth back to skillet.

8. Add the chicken to the skillet with broth. Add more broth if necessary. When we cooked the chicken, we cooked six thighs at once. Add a pat of butter to the mixture.

9. Cook for about 45 minutes. Check on it often. If you leave the heat too high, the broth will evaporate and you'll have to add more, so be careful!!! I would keep it between low and medium... just below the boiling mark.
10. Around the 45 minute mark, see if your chicken is cooked. MAKE SURE YOUR CHICKEN IS COOKED!!! Salmonella isn't fun for anyone. If it is cooked, add the vegetables back and add a little more broth/water if necessary.
11. Simmer for another ten minutes. Cook your rice while you do this: MULTITASKING FTW :D :D

12. EAT EAT EAT EAT!!!


The chicken just fell off the bone...it was amazing. I made the mistake of waiting too long to cook the rice, so I had a finished "casserole" and no rice...I suppose you could eat it as a soup, but I love rice with everything (I'm a true southern gal). Andrew likes it...he says it's a little spicy (weenie), but good.

Friday, July 23, 2010

Tilapia Meuniere Jury-rigged (We're gettin' fancy here)

So, as with everything, there's a story behind this. July 3rd, I had the "meet the mom" dinner with Andrew's mom and her husband, Jeff. We were eating at this awesome restaurant called "Ralph and Kacoo's." It's a seafood place (mmmmm my favorite). One of the specials for that day was the "Trout Meuniere." We all had no idea of what it was, and none of us ended up getting it, but it sparked my curiousity.
Turns out, it's a fish that is lightly floured and then pan-fry it. There are a lot of variations, so if you're curious about more, then just wiki it. We didn't have trout, but we did have a ton of tilapia. Andrew bought a 4lb bag back in the day, and we've been trying to come up with unique ways to cook it (shake-n-bake, cook in balsamic-vinaigrette, use actual fish-fry and then bake, etc).

So here is our version of trout meuniere:

Ingredients:
-BUTTER
-Tilapia (however many pieces you want, defrosted)
-Tony's or something similar
-Half a Lemon
-flour
-Rice (still using instant!)

Directions:
1. Take a mixing bowl and fill it with flour. At this point you can do one of two things. You can either season the flour, or you can season the fish and THEN flour it. Make sure the fish isn't soaking wet, but it is slightly damp. Lightly coat the fish.
2. Take a saucepan and add some butter. Keep it on the higher end of medium heat, the borderline. You can pan-fry it in oil, but our SMOKED like crazy. We thought it would set off the fire alarms, but we were lucky. Wait until the butter is browning, and then add a piece of fish. Cook it about three minutes on each side.
3. Repeat for each piece.
4. Cut down the heat on the pan to the lower end of medium, and add more butter. Season the butter with Tony's, and squeeze half a lemon's juice into the pan (be careful, cold + hot = maybe ouches). Cook the sauce. There may be flour in it, meaning there could be a brownish foam looking stuff, but don't worry about it.
5. Place the fish on the plate and pour sauce over it. Add a side of rice (keep it plain).

The reason the rice should be kept plain is that the rest of the dish is SO RICH. It took us forever to eat because it almost hurt. Think about it; the butter is infused into the tilapia from being cooked in it (so it almost melts in your mouth), plus you're adding a primarily butter sauce on top. The lemon that is added gives it a sharp taste to contrast the richness of the butter. Taste it before pouring it on your fish to make sure you like it, but it's a really good flavor combo.
Also, be careful of how many pieces you eat. I'm not saying you'll get sick, but you won't be able to move for a little while.

This is a super easy, SUPER cheap dish to make that is also somewhat fancy. I don't have a picture...we ate it too fast :P